
A sump pump can be “installed” and still fail when you need it most—usually because of the discharge setup, a bad check valve configuration, or simple failure points like a stuck float or a frozen line.
This checklist is written for Maryland basements in Montgomery County (Gaithersburg 20878, Rockville, Germantown, North Potomac, Derwood, Kentlands, and nearby areas). Use it to verify a new install, troubleshoot an existing system, or prep your home before the next heavy storm.
Safety first (before you touch anything)
- Turn OFF power to the sump circuit (breaker).
- Never reach into a wet pit with power on.
- If you see sewage odor, floor drain backup, or toilet bubbling, stop—this may be a sewer issue, not groundwater. In that case, start with Video Camera Sewer Inspection and, if needed, Sewer Line Repair & Replacement.
Installation checklist (the parts that actually prevent failures)

1) Sump pit basics
- Pit size: Large enough for the float to move freely (tight pits cause switch failures).
- Stable base: Pump sits on a firm surface (not loose gravel that can shift).
- Debris control: Pit is reasonably clean—no construction debris, stones, or sludge that can jam the impeller or float.
- Sealed lid (recommended): Helps reduce humidity, odors, radon entry, and accidental drops into the pit.
Pro note: If your “sump water” looks oily, rusty, or hot, or you have unusual pressure-related water events, it may be a supply-side leak. Consider Water Line Repair to rule that out.
2) Pump placement and discharge size
- Pump type: Submersible is typically best for most finished or semi-finished basements.
- Discharge diameter: Most systems run 1-1/2″ discharge; avoid reducing size unless the manufacturer allows it.
- Vertical rise: Confirm the pump is rated for your total head height (vertical lift + friction loss).
- Union or quick disconnect: Install a union on the discharge line above the pump for easy service/replacement.
3) Check valve: placement and orientation
A check valve prevents pumped water from falling back into the pit (which causes short cycling and early failure).
Checklist
- Correct direction: Arrow on the valve points away from the pump (toward discharge).
- Location: Typically installed on the vertical discharge line, above the pump, in an accessible spot.
- Service-friendly: A check valve with removable couplings or paired with a union makes future service painless.
- No leaks: Check for seepage at couplings and clamps after a test run.
Common check valve mistakes
- Installed backwards (pump runs but water returns instantly)
- Installed too high or buried where it can’t be serviced
- Cheap valve flapper sticking (causes intermittent failure and noise)
4) Discharge line routing (this is where most “floods” are born)
Your discharge line must move water away from the home reliably in heavy rain—without freezing or clogging.
Checklist
- Discharge point: Water exits well away from the foundation (not right at the corner of the house).
- Slope: Exterior line is sloped so it drains after each cycle (standing water = freeze risk).
- Freeze protection: In Maryland winters, add a plan for freezing:
- Keep exterior runs short where possible
- Avoid low spots that hold water
- Consider a “freeze relief” configuration (installed correctly, not improvised)
- No trip hazards: Discharge hoses across walkways are a common safety issue—use rigid pipe and proper routing.
- No illegal connections: Do not tie sump discharge into sanitary sewer lines. If you’re unsure, a plumber can confirm the route and compliance.
5) Anti–short cycling setup (protects the motor)
Short cycling kills pumps.
Checklist
- Float range: Adjusted so the pump runs long enough to clear meaningful water per cycle (not 5 seconds on/off).
- Check valve working: Prevents immediate backflow.
- Pit volume: Adequate for the pump size; oversized pumps in tiny pits cycle too often.
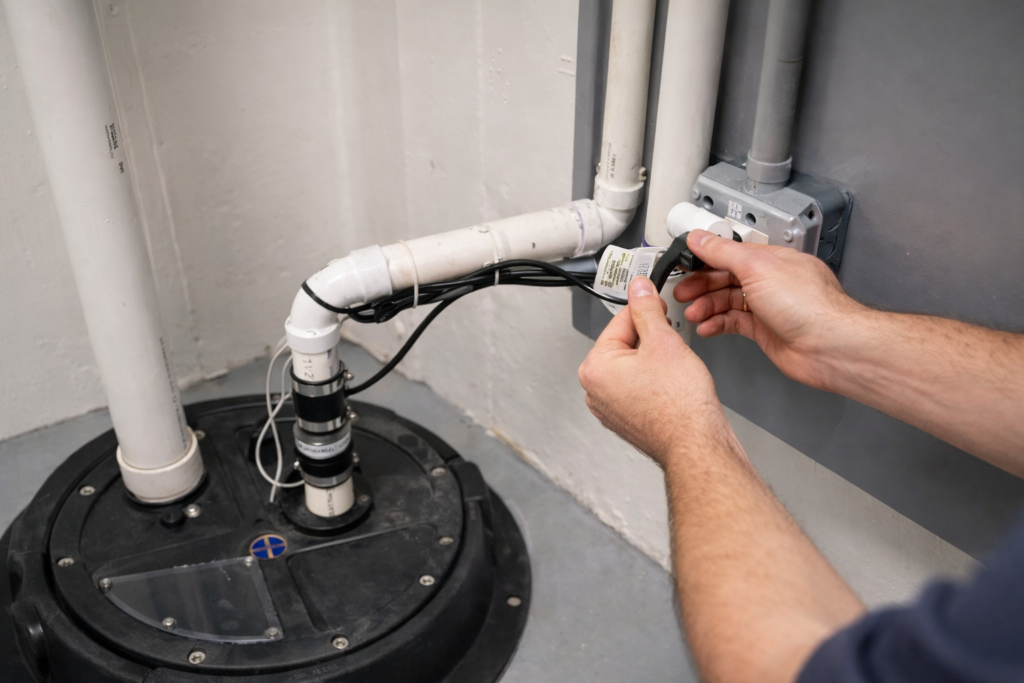
6) Electrical: the “silent” failure category
A perfectly plumbed sump system still fails if the electrical setup is unreliable.
Checklist
- Dedicated circuit (ideal): Avoid sharing the sump circuit with freezers, dehumidifiers, or other loads that can trip breakers.
- GFCI and receptacle: Follow local code requirements and use the correct outlet type for your setup.
- Cord management: Cord is secured so it can’t tangle the float.
- Alarm: Add a high-water alarm (cheap insurance).
Need a sump pump install or backup setup done right? Call Quince Orchard Plumbing for reliable, local service in Montgomery County, Maryland.
Backup options checklist (strongly recommended in Montgomery County)
Storms and outages often happen together. If your basement is finished in Kentlands, Rockville, or Montgomery Village, a backup is not optional.
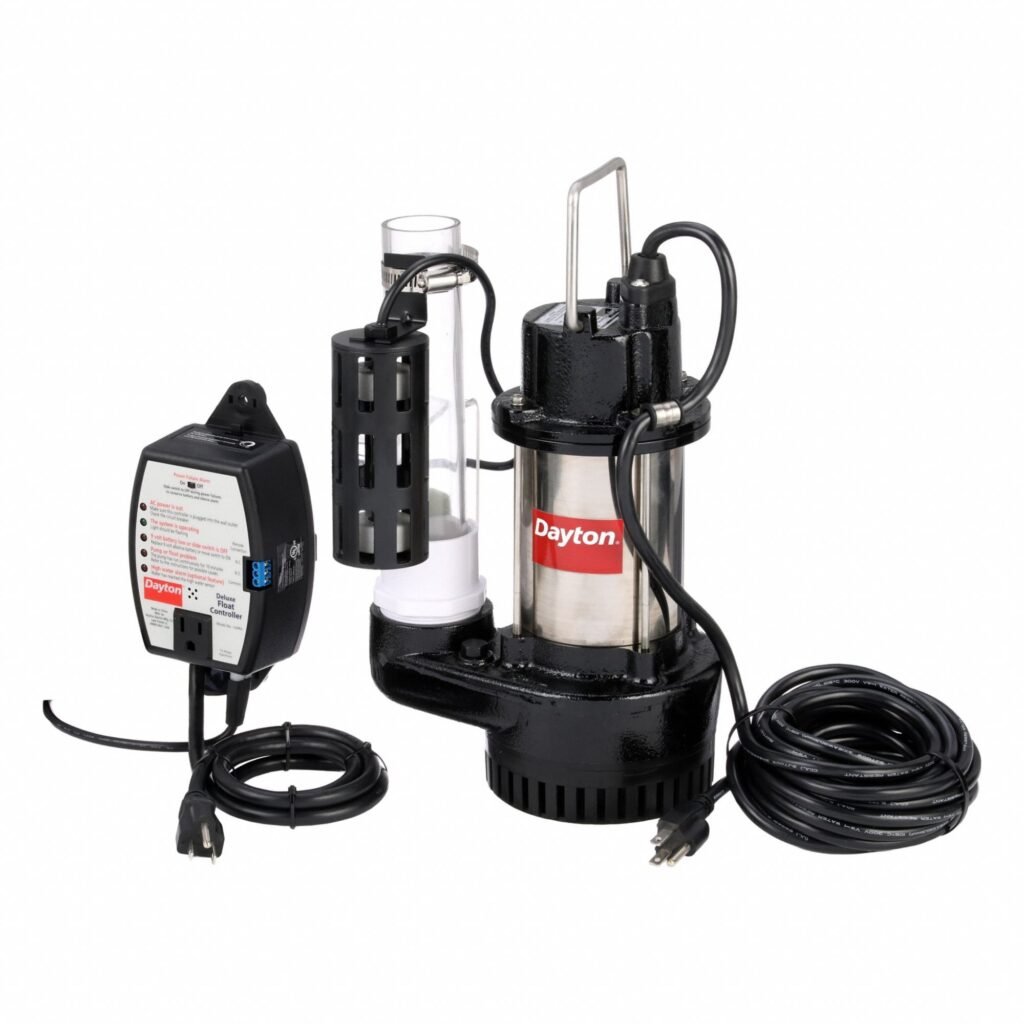
Battery backup sump pump
- Dedicated backup pump or integrated system
- Battery sized for runtime you need
- Alarm + periodic self-test (ideal)
Water-powered backup (municipal water only)
- Works without electricity
- Depends on water pressure and plumbing layout
Backup power (generator or power station)
- Must be safely sized for pump startup load
- Requires a real plan (fuel, runtime, testing)
The most common failure points (and how to catch them early)
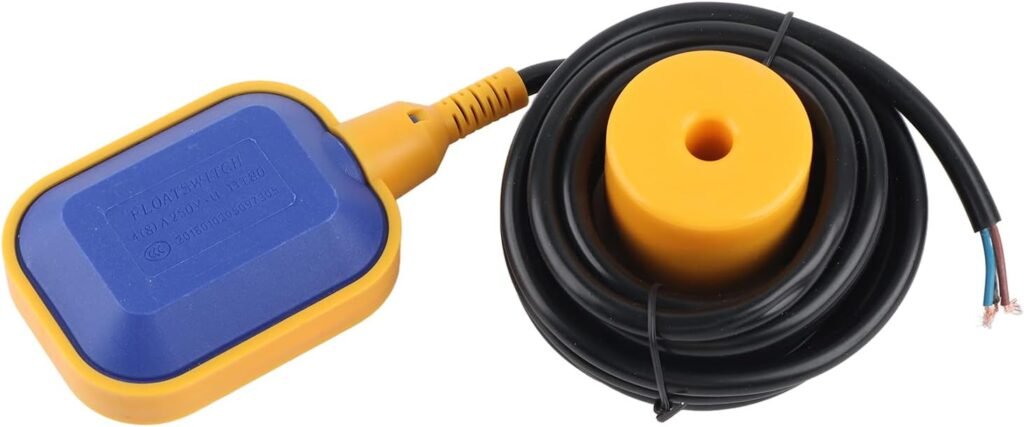
1) Stuck float switch
Signs: Pump doesn’t turn on, or runs nonstop.
Fix: Verify float has clear travel; remove debris; consider a more reliable switch style if repeat failures happen.
2) Frozen discharge line
Signs: Pump hums/runs, pit water doesn’t drop, or water returns immediately.
Fix: Correct exterior slope/drain-down, reduce exposure, and adjust routing.
3) Bad check valve or bad placement
Signs: Rapid cycling, loud “thunk,” frequent runs during light seepage.
Fix: Replace with a quality valve and service-friendly configuration.
4) Power/GFCI trips
Signs: Everything looks fine, but pump is off after a storm.
Fix: Dedicated circuit, correct outlet, reduce shared loads, add alarm.
5) Debris clogging the impeller
Signs: Weak pumping or noisy operation.
Fix: Clean pit; consider a better sealed lid; address drainage sources feeding debris.
Quick test procedure (do this before storm season)
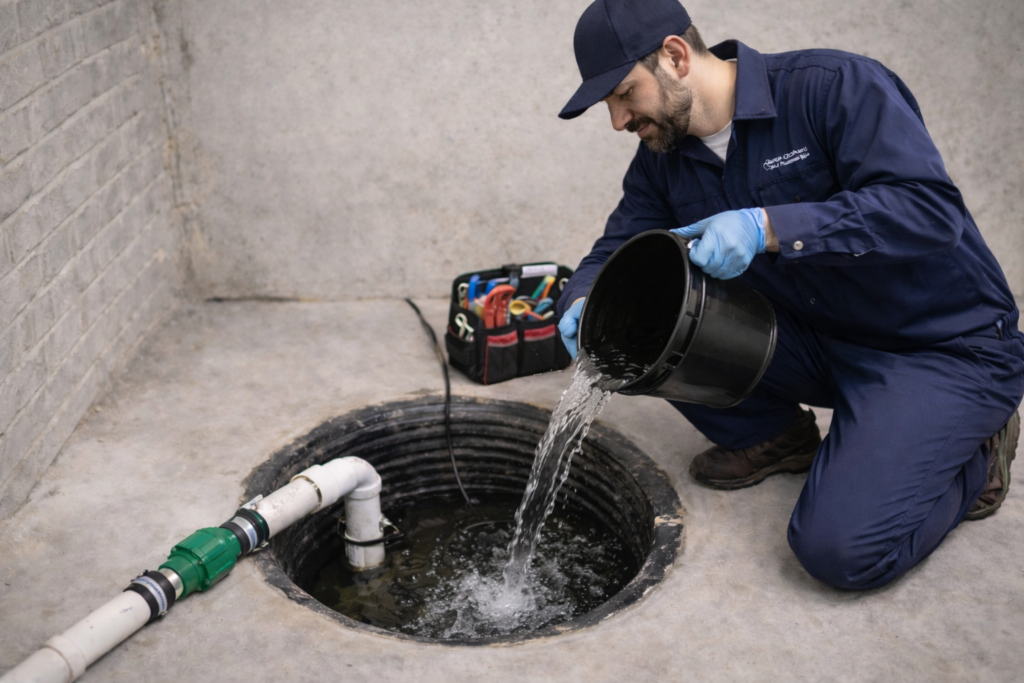
- Pour water into the pit until the pump activates.
- Confirm:
- Pump turns on smoothly
- Water level drops quickly
- Check valve prevents backflow
- Discharge exits outside and drains down after the cycle
- Repeat once more to confirm consistent behavior.
- Test backup system (battery status, alarm, activation).
Need a sump pump install or backup setup done right? Call Quince Orchard Plumbing for reliable, local service in Montgomery County, Maryland.
DIY vs call a pro
DIY is reasonable if:
- You’re replacing a similar pump in an accessible pit
- Discharge routing already exists and is correct
- You’re comfortable shutting off power and verifying operation safely
Call a pro if:
- You’ve had flooding before (you need sizing + backup planning)
- You suspect the discharge route is wrong or freezing
- You need a backup system installed and tested
- You’re seeing basement water plus drainage symptoms (gurgling drains, odors, backups)
If the basement mechanical area includes a water heater, it’s smart to protect that setup too—leaks in tight utility rooms can cause major damage. We can coordinate that through Water Heater Services.
If flooding or backflow events raise concerns about cross-connection safety, consider an evaluation via Backflow Prevention Services.
Service Area (Maryland only)
Quince Orchard Plumbing serves Gaithersburg (20878), Rockville, Germantown, North Potomac, Darnestown, Montgomery Village, Potomac (north), Derwood, Kentlands, and Washington Grove.